Free practical path · No experience needed

From zero to your first Little Whale

Learn one action at a time: observe, crochet, check, and correct. The 24 lessons follow the Little Whale prerequisites in order, without asking for a technique before teaching it.

Open the first lesson Your checkmarks stay only on this device.
  • 24 sequential hands-on lessons
  • Clear success checks
  • Progress stays on this device
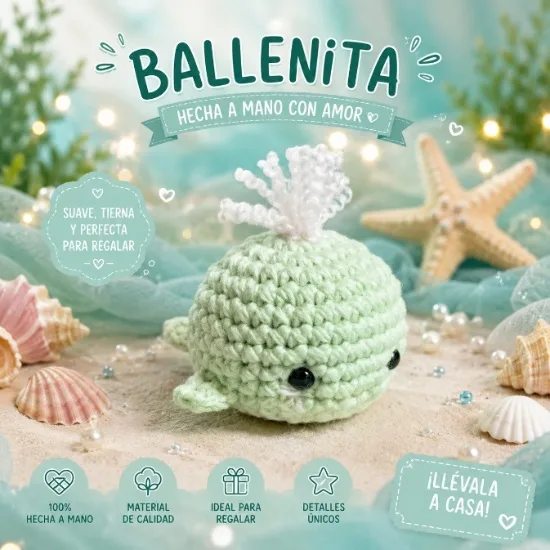
Mint green Little Whale amigurumi
0%Your course
Your course0%0%Look up a term ↓

Learn by doing

One action, one practice, one check

Use short sessions. Tomorrow, repeat any technique that needed help today.

  1. Watch or read one action.
  2. Crochet the practice with your own hands.
  3. Compare against the criteria, not only “it looks nice”.
  4. Correct and repeat once without help.

Module

1. Prepare your hands and materials

Identify your tools, find a comfortable posture, and learn to feed yarn before making stitches.

Lesson 1 of 24 · 4 min

Your minimum kit

By the end, you canChoose yarn and a hook that let you see and enter each stitch without forcing.In the Little Whale: You will prepare every material before starting R1.

For practice, use smooth light-colored medium yarn, a compatible hook, scissors, and a stitch marker. Identify the hook head or tip, the throat that carries yarn, the thumb rest, and the handle. For the Little Whale, add light green and white yarn, stuffing, a yarn needle, pins, and safety eyes or embroidery thread.

  1. Use the yarn label’s hook range as a starting point.
  2. Point to the hook head, throat, thumb rest, and handle.
  3. Separate crochet materials from finishing materials.
Overhead view of the Stitch Zero kit: mint yarn, coral hook, marker, scissors, yarn needle, stuffing, pins, and safety eyes with washers.
Minimum kit by moment of use

Your turn

Crochet before continuing

Lay out your kit, name the four hook parts, and point to what you will use to crochet, mark, stuff, and finish.

Check
  • The yarn strands are easy to distinguish.
  • You can identify the head, throat, thumb rest, and handle.
  • You have a marker you can move each round.
If it did not work as expected

What you seeThe yarn splits or the hook will not pass.

Likely causeThe hook may be too small or the yarn too fuzzy.

What to do nowTry a hook 0.5 mm larger or smoother light-colored yarn.

Before moving on

What helps most when you are starting?

Lesson 2 of 24 · 6 min

Posture, grip, and yarn feed

By the end, you canHold yarn and hook with steady tension, without pain or stiffness.In the Little Whale: A repeatable posture lets you finish rounds without pain or sudden pulls.

You may hold the hook like a pencil or a knife. The best choice keeps your wrist nearly straight. Without making stitches yet, route the skein yarn through the opposite hand and let it slide over the index finger: that hand feeds yarn while the other guides the hook. Do not wrap yarn tightly enough to mark the skin.

  1. Support your forearms and lower your shoulders.
  2. Try both grips with an empty hook for ten movements.
  3. Feed a few centimeters of yarn over the index finger and stop it again without squeezing.

If you are left-handed, mirror the hand direction or use a mirrored view; loop counts and the order of every action stay the same.

Pencil and knife hook grips compared with relaxed wrists; a small silver tabby cat appears as the brand mascot.
Two comfortable hook grips

Your turn

Crochet before continuing

Try the pencil and knife grips for thirty seconds each. With your chosen grip, feed and stop the yarn five times without making a stitch.

Check
  • The wrist stays nearly straight.
  • The yarn feeds without marking the skin.
  • You can start and stop the feed without lifting your shoulders.
If it did not work as expected

What you seeYour wrist bends or yarn leaves a deep mark.

Likely causeYour grip or yarn wraps are tighter than needed.

What to do nowLet go, shake out your hands, and reset the hook and yarn. Stop if pain continues.

Before moving on

Which grip is best?

Module

2. Control yarn and create stitches

Progress without gaps: knot, chain, sc, anatomy, ring, joined rounds, and gauge.

Lesson 3 of 24 · 4 min

Slip knot

By the end, you canMake an adjustable loop that slides on the hook.In the Little Whale: It prepares you to control yarn before the tail and fin chains.

Make a loop, pull a strand from the skein through its center, and insert the hook. Tighten with the working yarn, but leave room for the loop to slide.

Your turn

Crochet before continuing

Make and undo the knot three times until you can identify the tail and working yarn.

Check
  • The loop shrinks when you pull the working yarn.
  • It is not tight against the hook throat.
  • You can undo it without cutting yarn.
If it did not work as expected

What you seeThe loop does not move.

Likely causeYou made a fixed knot or used the wrong strand.

What to do nowUndo it and make sure the strand pulled through the center comes from the skein.

Lesson 4 of 24 · 5 min

Chain (ch)

By the end, you canMake an even chain with one pull-through per movement.In the Little Whale: You will use it to lift each round and build the tail and fins in R10.

With one loop on the hook, wrap yarn from back to front over the hook; this is a yarn over. Turn the throat toward the loop and pull through that single loop. Move your thumb and middle finger close to the newest link. The front shows a row of V shapes and the back shows small bumps. Do not count the slip knot or active loop; count only finished chain V shapes.

  1. Yarn over from back to front and pull through the one loop.
  2. Move your fingers to the new link and count only finished V shapes.
  3. Turn the chain to identify front V shapes and back bumps; locate the second chain from the hook without counting the active loop.

Your turn

Crochet before continuing

Make ten comfortable chains, verify ten V shapes without counting the knot or active loop, identify front and back, and point to the second chain from the hook.

Check
  • Each movement leaves one active loop on the hook.
  • The chain gains exactly one finished V.
  • You can identify front and back and locate the second chain.
If it did not work as expected

What you seeThe chain twists or varies greatly in size.

Likely causeYour holding hand is too far from the newest link or tension changes.

What to do nowMove your thumb after every chain and use smaller hand movements.

Before moving on

What stays out of a chain count?

Lesson 5 of 24 · 7 min

Single crochet (sc)

By the end, you canComplete a single crochet in a V or the second chain from the hook.In the Little Whale: It is the main stitch for the body, tail, and much of the fins.

On a round, insert under both loops of the V. On a foundation chain, do not count the active loop and do not work into the first chain: insert from front to back into the second chain from the hook. Yarn over and pull up a loop for two loops; yarn over again and pull through both. One active loop remains.

  1. When starting from a chain, locate the second chain from the hook.
  2. Insert, yarn over, and pull up a loop so you can see two.
  3. Yarn over again and pull through both loops.

Your turn

Crochet before continuing

Make thirteen chains and work twelve sc beginning in the second chain from the hook. Say: “second chain; insert, pull up one, through two.”

Check
  • You begin in the second chain and make twelve sc.
  • Two loops are visible before the final pull-through.
  • One loop remains after every stitch.
If it did not work as expected

What you seeThe stitch is very short or seems to disappear.

Likely causeYou made a slip stitch or pulled through everything at once.

What to do nowPause when two loops are visible and yarn over a second time.

Before moving on

How many loops are on the hook just before the final sc pull-through?

Lesson 6 of 24 · 5 min

Recognize a V and use the marker

By the end, you canTell the active loop from a finished V and locate the first and last V.In the Little Whale: You will count all 15 rounds correctly and know where each one ends.

The top of every finished stitch forms a V with two loops; the loop still on the hook is active and is not counted. View the right side, where the V shapes are clean, and the wrong side, where posts and bumps show. Unless the pattern says otherwise, insert under both loops. Pass the marker through the first finished V, never through the active loop.

  1. Orient the sample with the top V shapes facing you.
  2. Trace from the first to the last V without counting gaps or the active loop.
  3. Mark the first V through both loops.
Mint crochet round held between the hands; the top V shapes are visible and a turquoise marker identifies the first stitch.
Top V anatomy and marker position

Your turn

Crochet before continuing

On the row of twelve sc you just made, identify right and wrong sides, touch the first and last V, count twelve, and mark the first.

Check
  • You count twelve finished V shapes and exclude the active loop.
  • You can identify right and wrong sides.
  • The marker passes through both loops of the first V.
If it did not work as expected

What you seeThe count changes even without increases.

Likely causeYou may have counted a gap or lifting chain, or skipped the first V.

What to do nowReturn to the marker and trace only the top V shapes with a blunt needle.

Before moving on

What should you count across the top of a 12-stitch round?

Lesson 7 of 24 · 8 min

Magic ring (MR)

By the end, you canMake an adjustable ring, work into it, and close the center.In the Little Whale: The Little Whale begins with six single crochets in an MR.

Cross yarn around two fingers, go under the first strand, and catch the second to secure the ring. Work into the large opening, not into one strand. After six stitches, hold the base and pull the tail.

  1. Make and secure the ring.
  2. Work six stitches into the opening.
  3. Count six V shapes and pull the tail closed.

If you cannot hold the ring yet, practice ch 2 and work 6 sc in the second ch from the hook. Use this only as temporary support, then return to the MR until the tail closes it.

Your turn

Crochet before continuing

Make two guided rings and a third without looking. Leave it with six stitches and a closed center.

Check
  • The ring remains adjustable before pulling.
  • There are exactly six V shapes.
  • The center closes without undoing stitches.
If it did not work as expected

What you seeThe tail will not close the center.

Likely causeThe stitches surrounded the wrong strand or trapped the tail.

What to do nowUndo before continuing: the ring must slide when the tail is pulled.

Before moving on

When do you pull the tail?

Lesson 8 of 24 · 6 min

Slip stitch and lifting chain

By the end, you canJoin the last stitch to the first and prepare the next round.In the Little Whale: R1–R9 and R11–R14 join with sl st; chain only when that round says so. R10 changes color and R15 fastens off.

Mark the first real sc. At the end of the round, insert into that V and pull yarn through the stitch and hook loop in one motion: this is a sl st. Chain only when the round says so; it does not count as a stitch. Do not work into the sl st or lifting chain. Find the first real sc of the new round and move the marker there. The Little Whale uses joined rounds; if another pattern calls for a spiral, omit these joins.

  1. Mark the first real sc and complete the round.
  2. Join with sl st in that first sc.
  3. Make the stated chain, work the first new sc, and move the marker to that V.

Your turn

Crochet before continuing

Work two complete six-sc rounds: mark, count, join, chain one, and mark the first real sc again. Do not count or work into the join or chain.

Check
  • The sl st adds no height and is not counted.
  • The lifting chain stays separate and is not counted.
  • Each of the two completed rounds still has six real V shapes.
If it did not work as expected

What you seeEvery round gains an extra stitch.

Likely causeThe lifting chain is being counted or worked into.

What to do nowMark the first real sc and count from there to the stitch before the join.

Lesson 9 of 24 · 10 min

Amigurumi gauge and density

By the end, you canChoose a hook that produces flexible, even fabric without stuffing gaps.In the Little Whale: You will prevent stuffing from showing and keep the body from becoming rigid or hard to work.

Ch 13 and, beginning in the second chain, work 12 sc. Complete four rows of 12 sc, turning with ch 1 that does not count. Place a little white stuffing behind the swatch; it should not show. If gaps appear, try a hook 0.5 mm smaller. If insertion is difficult and the fabric is rigid, try a larger hook. Change hook size instead of forcing an artificial tension your hands cannot maintain.

  1. Make a swatch of 12 sc by four rows and verify every count.
  2. View stuffing behind it in normal light and flex the swatch.
  3. Repeat with another hook size only if there are gaps or stiffness.
Three chains made from the same mint yarn show loose, comfortable, and tight tension.
Three tensions to compare

Your turn

Crochet before continuing

Compare two swatches if needed and keep the one that hides stuffing without requiring force to insert.

Check
  • Every row has twelve sc.
  • Stuffing does not show between stitches.
  • The hook enters without scraping and the swatch can flex.
If it did not work as expected

What you seeStuffing shows or the hook barely enters.

Likely causeThe hook size does not create the right density for your yarn and natural tension.

What to do nowChange hook size by 0.5 mm, repeat, and check again; do not add stitches or tighten painfully.

Before moving on

If stuffing shows but your counts are correct, what do you try first?

Module

3. Build and control shape

Build predictable shape with increases, even rounds, loops, and decreases.

Lesson 10 of 24 · 6 min

Increase (inc)

By the end, you canWork two single crochets into the same V and recognize the growth.In the Little Whale: R2–R5 expand the body from 6 to 30 stitches.

Complete one sc and, without moving to the next V, enter the same base again for another. One base stitch becomes two new stitches, so the count rises by one. To keep a circle flat, spread six increases around every round: 6 → 12 → 18 → 24 → 30, placing more sc between them each time.

  1. In R2, increase in all 6 bases for 12.
  2. In R3, alternate 1 sc and 1 inc for 18.
  3. Predict R4 and R5: six distributed increases produce 24 and 30.
Three flat crochet circles grow from left to right, each with a marker at the start.
Growth from 6 to 12 and 18 stitches

Your turn

Crochet before continuing

Make one increase in each of six base stitches and verify twelve V shapes; then place six small markers on a sample to rehearse the next round’s distribution.

Check
  • Each base in the first exercise receives exactly two sc.
  • Six increases are distributed around the round.
  • You can predict 12, 18, 24, and 30 before crocheting.
If it did not work as expected

What you seeYou finish with fewer than twelve stitches.

Likely causeThe second sc went into the next V or a base was skipped.

What to do nowUse a blunt needle to separate the two stitches that should share each base.

Before moving on

If you start with 6 stitches and make 6 increases, how many do you finish with?

Lesson 11 of 24 · 5 min

Even rounds: same count, more height

By the end, you canKeep the same count so a flat base grows into volume.In the Little Whale: R6–R9 keep 30 stitches and raise the body.

When you work one sc in every stitch with no increases or decreases, the total stays the same. The piece stops growing outward and starts gaining height. The end count is your quality check.

Your turn

Crochet before continuing

Work two rounds of twelve sc. Stop at each marker and confirm twelve V shapes.

Check
  • Each V receives one sc.
  • The total remains 12.
  • The wall begins to rise without ruffling.
If it did not work as expected

What you seeThe piece opens or closes unexpectedly.

Likely causeA stitch was added, skipped, or duplicated.

What to do nowUndo to the last round whose count you verified.

Before moving on

If a round starts and ends with 30 sc, what mainly changes?

Lesson 12 of 24 · 5 min

Front loop only (FLO)

By the end, you canEnter only the loop of the V closest to you and leave the back loop free.In the Little Whale: R10 uses FLO for the fins and R11 returns to the free loops.

First orient the right side outward and the opening upward. View the V from above: in that position, the front loop is closest to you and the back loop faces inside. Insert only under the front loop. The back loop should remain as a visible free line for later use.

  1. Confirm the right side, wrong side, and opening before naming loops.
  2. Point to both loops of the same V.
  3. Work under the front loop and find the matching free back loop again.
Close-up of the hook working through one loop of the top V while the back loop remains free.
Front and back loops

Your turn

Crochet before continuing

Work four sc in FLO, keep the piece oriented, and find the four free back loops.

Check
  • The piece keeps the correct orientation.
  • The hook passes through one loop.
  • The free back-loop line is continuous.
If it did not work as expected

What you seeYou cannot find the free loops.

Likely causeYou probably worked under both loops.

What to do nowUndo to the first V and confirm orientation before repeating.

Lesson 13 of 24 · 7 min

Invisible decrease (dec)

By the end, you canTurn two consecutive stitches into one using their front loops.In the Little Whale: R12–R15 reduce the opening from 30 to 6 stitches.

Pick up the front loop of the first V and then the second. Pull yarn through both front loops and complete the stitch. Two bases now make one stitch and the decrease is less visible.

Your turn

Crochet before continuing

Alternate one sc and one decrease in a sample. Count before and after.

Check
  • You pick up one loop from each of two consecutive V shapes.
  • The back loops stay free.
  • The count drops by one for each decrease.
If it did not work as expected

What you seeThe decrease looks bulky or very tight.

Likely causeAll four loops were used or tension tightened too soon.

What to do nowUse only the two front loops and keep the working loop the same size as nearby sc.

Before moving on

What happens to the count after one decrease?

Module

4. Read, predict, and correct

Turn every line into actions, master 6–30, and learn to unravel with control.

Lesson 14 of 24 · 7 min

Decode a round

By the end, you canSeparate the round number, repeated block, repetitions, and expected total.In the Little Whale: You will interpret all 15 lines without memorizing every abbreviation.

“R3: (1 sc, 1 inc) ×6 (18 sts)” shows the round, the repeated block, how often it repeats, and the final total. Read the total first, then break the action into small blocks. Separate base positions consumed from decorative stitches created: in R10, chains and dc build the tail and fins while the route still continues over 30 base V shapes. This course uses US terms: US sc is UK dc, and US dc is UK tr. Check the terminology declared by every outside pattern before starting.

  1. Point to R3.
  2. Circle the two-action block.
  3. Count six repeats.
  4. Verify 18 V shapes before joining.

Your turn

Crochet before continuing

Before crocheting, explain the line in your own words and predict the total for R2 and R3.

Check
  • You distinguish the round number from the final count.
  • You know which actions repeat.
  • You stop if the actual total does not match.
If it did not work as expected

What you seeThe block shifts and increases group together.

Likely causeIndividual stitches were counted but completed repeats were not.

What to do nowUse six tokens and move one after each complete block.

Before moving on

In “(1 sc, 1 inc) ×6 (18)”, what repeats six times?

Lesson 15 of 24 · 18 min

Mastery check: 6 → 12 → 18 → 24 → 30

By the end, you canCombine MR, sc, inc, sl st, ch, marker, and counting across the first five rounds.In the Little Whale: This is a complete rehearsal of R1–R5 before using project yarn.

Work R1 with 6 sc; R2 with 6 inc for 12; R3 with (1 sc, 1 inc) ×6 for 18; R4 with (1 sc, 1 inc, 1 sc) ×6 for 24; and R5 with (3 sc, 1 inc) ×6 for 30. At every transition, mark the first real sc, join with sl st, make the stated chain without counting it, and verify the total before continuing.

  1. Predict the total and prepare six tokens for each repeat.
  2. Work one round, join, move the marker, and count every V.
  3. Do not continue until shape, repeats, and total all agree.

Your turn

Crochet before continuing

Complete the sample once with every line, then again using only “6 → 12 → 18 → 24 → 30”.

Check
  • Totals are 6, 12, 18, 24, and 30.
  • The center is closed and the sample stays flat.
  • The sl st and chain never enter the count.
  • You can explain where all six increases are distributed in each round.
If it did not work as expected

What you seeThe total matches, but increases cluster and distort the shape.

Likely causeStitches were counted, but complete repeats were not.

What to do nowUndo to the marker and move one token after every complete repeat.

Before moving on

What total should R5 have after six distributed increases?

Lesson 16 of 24 · 6 min

Find and fix without restarting

By the end, you canRecognize a lost stitch, an added stitch, and a wrong insertion.In the Little Whale: You can repair a round before the error changes the Little Whale’s shape.

Compare three signals: total, marker position, and shape. If one is wrong, hold the piece securely, remove the hook, and pull the working yarn slowly. Stop just before the error, reinsert the hook into the one live loop, and count from the last safe stitch. Undoing to the last correct count is a repair, not a failure.

  1. Hold the last correct V so you do not unravel too far.
  2. Remove the hook and pull yarn gradually until just before the error.
  3. Reinsert the hook in the live loop, replace the marker, and count again.

Your turn

Crochet before continuing

Deliberately add one stitch; count, locate it, unravel to just before it, recover the live loop, and crochet again.

Check
  • You name what you see and suggest a cause.
  • You keep control of the live loop while unraveling.
  • You reinsert the hook, correct the error, and reach the expected count.
If it did not work as expected

What you seeYou keep crocheting and hope the next round fixes it.

Likely causeThere is no recent checkpoint.

What to do nowMake the marker and final count a mandatory pause.

Before moving on

The pattern expects 18 stitches and you count 19. What comes first?

Module

5. Little Whale special techniques

Rehearse tail, fins, color change, eyes, stuffing, and every finish before R10–R15.

Lesson 17 of 24 · 9 min

Integrated tail rehearsal

By the end, you canMake two tail lobes and return to the first base stitch without cutting yarn.In the Little Whale: This is the first sequence in R10 and forms the Little Whale tail.

From the active loop, ch 5. Do not count that loop: enter the second chain from the hook and work 4 sc back toward the body, one per chain. Without cutting, ch 5 again and repeat 4 sc for the second lobe. Then locate the first stitch of the circular base; the tail does not consume a new body V until you return there.

  1. Lobe 1: ch 5 and work 4 sc from the second chain.
  2. Lobe 2: without cutting, repeat ch 5 and 4 sc.
  3. Separate both lobes visually and return to the marked first base stitch.

Your turn

Crochet before continuing

Rehearse the tail on a twelve-stitch sample and verify each lobe before continuing over the base.

Check
  • Each lobe keeps five chains and four sc.
  • The sc travel back toward the body.
  • Yarn remains uncut and you return to the first base stitch without skipping it.
If it did not work as expected

What you seeOne lobe is shorter or a gap appears at the body.

Likely causeYou entered the first chain, lost a chain, or returned to the wrong base V.

What to do nowCount from the hook, mark the second chain, and keep the body’s first stitch marked.

Before moving on

Does the active loop count as the first of five chains?

Lesson 18 of 24 · 6 min

Double crochet (dc)

By the end, you canComplete a double crochet with loop counts 1 → 3 → 2 → 1.In the Little Whale: R10 combines dc, ch, and sl st to give each fin height.

Yarn over before inserting. Pull up a loop for three; yarn over and pull through two, then yarn over and pull through the last two. It is taller than sc.

Your turn

Crochet before continuing

Work three separate dc stitches and say the loop count at every stage.

Check
  • The yarn-over happens before insertion.
  • Three loops are visible at the peak.
  • You close in two passes and finish with one.
If it did not work as expected

What you seeThe stitch is as short as sc.

Likely causeThe initial yarn-over was missed or all loops were pulled through at once.

What to do nowRepeat slowly while counting 1, 3, 2, 1.

Before moving on

How many loops are on the hook after pulling up a loop in dc?

Lesson 19 of 24 · 11 min

Complete fin motif and BLO return

By the end, you canUse two base V shapes to form one fin and preserve their back loops for R11.In the Little Whale: R10 makes two integrated fins and R11 works into the back loops left free.

After 6 base sc, use two consecutive V shapes. In the first, working FLO only, make 1 sl st, ch 2, and 1 dc in that same V. In the second, also FLO, make 1 dc, ch 2, and 1 sl st. Chains and dc create the relief, but you consumed only two round positions. The complete map of the 30 R10 base V shapes is: 6 sc + 2 fin bases + 14 sc + 2 fin bases + 6 sc. In R11, recover the free back loops from those four bases.

  1. Mark two V shapes and work the entire first block in the first and the second block in the second.
  2. Count base positions, not every decorative stitch created.
  3. Turn the piece, locate both free back loops, and rehearse one sc in each.

Your turn

Crochet before continuing

Work the full motif over two V shapes, repeat it after fourteen base V shapes, and point to the four loops you will recover in R11.

Check
  • Each fin consumes exactly two base V shapes.
  • Each fin reads sl st–ch 2–dc | dc–ch 2–sl st.
  • The map consumes 6 + 2 + 14 + 2 + 6 = 30 positions.
  • All four back loops remain visible and usable.
If it did not work as expected

What you seeThe round ends before 30 bases or no free loops remain.

Likely causeChains were counted as new bases or both loops were used.

What to do nowMark all 30 base V shapes and repeat the motif in FLO across its four positions.

Before moving on

How many base V shapes does one complete fin consume?

Lesson 20 of 24 · 5 min

Clean color change

By the end, you canFinish the last stitch with the new color and leave one active loop.In the Little Whale: At the end of R10, change from light green to white for R11.

Begin the last sc with the old color and pause with two loops. Catch the new color and pull through both. Tighten gently; no visible knot is needed. Leave tails long enough, secure them as the pattern directs, and weave them under several posts on the wrong side; never trim flush with the surface.

Your turn

Crochet before continuing

Make two changes, identify which part stays in the old color, and hide both tails without puckering.

Check
  • The base stitch stays in the old color.
  • The closure and active loop show the new color.
  • Both tails are secured and hidden without a visible knot.
If it did not work as expected

What you seeThe color begins late or a tail comes loose.

Likely causeThe last stitch was closed in the old color or tails were cut flush.

What to do nowUndo the stitch and close with the new color; leave enough length to secure and weave in both tails.

Lesson 21 of 24 · 7 min

Safe eyes: measure before securing

By the end, you canMark, compare, and secure the eyes only after confirming placement.In the Little Whale: After R14, place eyes between R9 and R10 with six complete stitches between them.

Mark both positions with pins between R9 and R10. Count six complete V shapes between the insertion points and view the face from the front, side, and top. Only then insert each eye, orient its washer inside, and press until flat; test with a gentle tug. For children under three, embroider eyes instead of using plastic pieces.

  1. Mark with pins and count six complete stitches between positions.
  2. Compare symmetry from three angles before inserting.
  3. Press each washer inside and perform a gentle pull test.
Two panels show the relationship between a safety eye and washer, and a piece being stuffed in small portions.
Safety eyes and gradual stuffing

Your turn

Crochet before continuing

Rehearse both positions with pins, count twice, and say what you will verify before securing.

Check
  • Both eyes sit between R9 and R10.
  • There are six complete stitches between their positions.
  • Washers face correctly, sit flat, and pass a gentle pull test.
If it did not work as expected

What you seeThe face looks crooked or an eye moves.

Likely causeThe eyes were secured before comparison or a washer did not seat fully.

What to do nowDo not press washers before checking symmetry; replace any part that will not seat before stuffing.

Before moving on

When do you confirm eye placement?

Lesson 22 of 24 · 6 min

Even stuffing with an accessible opening

By the end, you canAdd stuffing in small portions without lumps or losing access to the final rounds.In the Little Whale: Begin after installing the eyes in R14 and finish shaping during R15.

Separate stuffing into small pinches. Insert one, spread it toward edges and empty areas with fingers or a blunt tool, and rotate the piece to compare symmetry. Keep the active loop, marker, and opening clear. After the R15 decreases, add only enough for a firm body, not a hard one.

  1. Add one pinch and distribute it before taking the next.
  2. Compare front, side, and underside every two portions.
  3. Keep the opening and active loop accessible until R15 is complete.

Your turn

Crochet before continuing

Stuff a round sample in stages and stop three times to check symmetry, empty areas, and access to the round.

Check
  • Stuffing reaches the edges without showing between stitches.
  • There are no lumps or empty spots.
  • The opening, marker, and active loop remain accessible.
If it did not work as expected

What you seeThe piece bulges or stuffing spills from the opening.

Likely causeA large portion was inserted before the previous one was distributed.

What to do nowRemove some stuffing, tease it apart, and add it again in small pinches.

Before moving on

When do you add the next portion?

Lesson 23 of 24 · 7 min

Final closure and hidden tails

By the end, you canClose six stitches with a yarn needle and hide a tail without puckering.In the Little Whale: R15 closes and secures the finished body.

Fasten off by cutting a long tail and pulling it all the way through the active loop. Thread the needle and pass it under both loops of each of the six final V shapes in circular order. Pull closed and hide the tail under several posts. Tighten only enough to close; loosen if the surface puckers.

Yarn needle passed under both loops of each of the six final V shapes before the opening is tightened.
Needle path through six V shapes

Your turn

Crochet before continuing

Rehearse the fasten-off and closure on a small sample; locate all six complete V shapes again before pulling.

Check
  • The fasten-off secures the final active loop.
  • The needle follows all six V shapes under both loops and in order.
  • The center closes in a circle.
  • The tail is hidden without distortion.
If it did not work as expected

What you seeA bump or visible knot remains.

Likely causeThe tail was cut too short or pulled through stuffing.

What to do nowLeave enough length and hide horizontally under firm posts.

Lesson 24 of 24 · 6 min

Embroidery and finishing

By the end, you canAdd small details and hide ends with gentle tension.In the Little Whale: Finish the white details under the eyes and the water spout.

First mark the white detail under each eye and the water-spout exit at the top with pins. Bring the needle in from a discreet area, follow a short path between marks, and let each stitch rest on the surface before hiding the tail under several posts. Compare both sides and make sure the face keeps its shape.

  1. Mark placement and length before threading.
  2. Embroider from the center toward each end with gentle tension.
  3. Bring the needle to a discreet area and weave the tail under several posts.

Your turn

Crochet before continuing

On a sample, rehearse two symmetrical lines like the eye details and one small water spout; undo one to practice without fear.

Check
  • Details match the marks and are symmetrical.
  • The surface does not sink.
  • The path and ends remain hidden.
If it did not work as expected

What you seeThe face changes shape while embroidering.

Likely causeThread tension is tighter than the fabric.

What to do nowLoosen before hiding the end and tighten only until the stitch rests on the surface.

Help whenever you need it

Your crochet translator

Tap an abbreviation whenever you need it. You do not have to memorize it before you begin.

10 terms

Optional support

Save your materials guide

Your progress is already saved only on this device. Entering your email does not sync lessons or rounds, and it cannot restore them on another device.

Use this form if you want to open the free Little Whale guide and save your request. Course news is a separate option.

  • You can complete the entire tutorial without sharing your details.
  • We never send your checked lessons or rounds.

This form does not send your lessons, rounds, or any progress data. Read the privacy policy.

Graduation project

Little Whale, round by round

Materials: 2 mm cotton yarn in light green and white, black embroidery thread, a 2.5 mm hook, 5–6 mm safety eyes, stuffing, yarn needle, stitch marker, scissors, and pins. Embroider eyes for children under three. Keychain hardware is optional.

Round 1 of 15R16 stitches at the end

Light green: make a magic ring with 6 sc. Join with 1 sl st and ch 1.

Add the white detail under each eye and the little water spout. Check that every yarn tail is hidden. The keychain fitting is optional.

Crochet glossary